Spotify in the CLI
I've been looking into optimizing my system resources these days and stumbled across spotify-tui and spotifyd. It significantly reduces the footprint of running the Electron-based desktop client and still allows you to control all your devices!
First install spotifyd
brew install spotifydConfiguration for spotifyd can be passed via CLI arguments or a TOML file.
We want to run spotifyd as a brew service, thus I recommend using a configuration file.
vim ~/.config/spotifyd/spotifyd.confHere is my stripped down version of the configuration. All options can be found here.
[global]
# Enable keychain lookup (we will set this up in the next step)
use_keyring = true

# If set to true, `spotifyd` tries to bind to the session dbus
# and expose MPRIS controls. When running headless, without a dbus session,
# then set this to false to avoid binding errors
use_mpris = true

# The audio backend
backend = "rodio"

# The volume controller
volume_controller = "softvol"  # use alsa for Linux

# The name that gets displayed under the connect tab on
# official clients. Spaces are not allowed!
device_name = "spotifyd"

# The audio bitrate. 96, 160 or 320 kbit/s
bitrate = 320

# The directory used to cache audio data. This setting can save
# a lot of bandwidth when activated, as it will avoid re-downloading
# audio files when replaying them.
#
# Note: The file path does not get expanded. Environment variables and
# shell placeholders like $HOME or ~ don't work!
cache_path = "/Users/USERNAME/Library/Application Support/Spotify/PersistentCache/Storage"

# If set to true, audio data does NOT get cached.
no_audio_cache = false

# Volume on startup between 0 and 100
# NOTE: This variable's type will change in v0.4, to a number (instead of string)
initial_volume = "90"

# If set to true, enables volume normalisation between songs.
volume_normalisation = true

# The normalisation pregain that is applied for each song.
normalisation_pregain = -10

# The displayed device type in Spotify clients.
# Can be unknown, computer, tablet, smartphone, speaker, t_v,
# a_v_r (Audio/Video Receiver), s_t_b (Set-Top Box), and audio_dongle.
device_type = "speaker"
I like to use the use_keyring option to safely add my configuration to my dotfiles repo.
Run this command and follow the instructions to add your credentials to the macOS keychain.
security add-generic-password -s spotifyd -D rust-keyring -a <your_spotify_username> -wNow lets verify if spotifyd is running.
brew services
Name Status User Plist
spotifyd started ecklf /Users/ecklf/Library/LaunchAgents/homebrew.mxcl.spotifyd.plist
If the service is not started yet, you can use the following.
brew services start spotifydbrew install spotify-tuiFollow the instructions (taken from spotify-tui's readme).
- Go to the Spotify dashboard
- Click
Create an app- You now can see your
Client IDandClient Secret
- You now can see your
- Now click
Edit Settings - Add
http://localhost:8888/callbackto the Redirect URIs - Scroll down and click
Save - You are now ready to authenticate with Spotify!
- Go back to the terminal
- Run
spt - Enter your
Client ID - Enter your
Client Secret - Press enter to confirm the default port (8888) or enter a custom port
- You will be redirected to an official Spotify webpage to ask you for permissions.
- After accepting the permissions, you'll be redirected to localhost. If all goes well, the redirect URL will be parsed automatically and now you're done. If the local webserver fails for some reason you'll be redirected to a blank webpage that might say something like "Connection Refused" since no server is running. Regardless, copy the URL and paste into the prompt in the terminal.
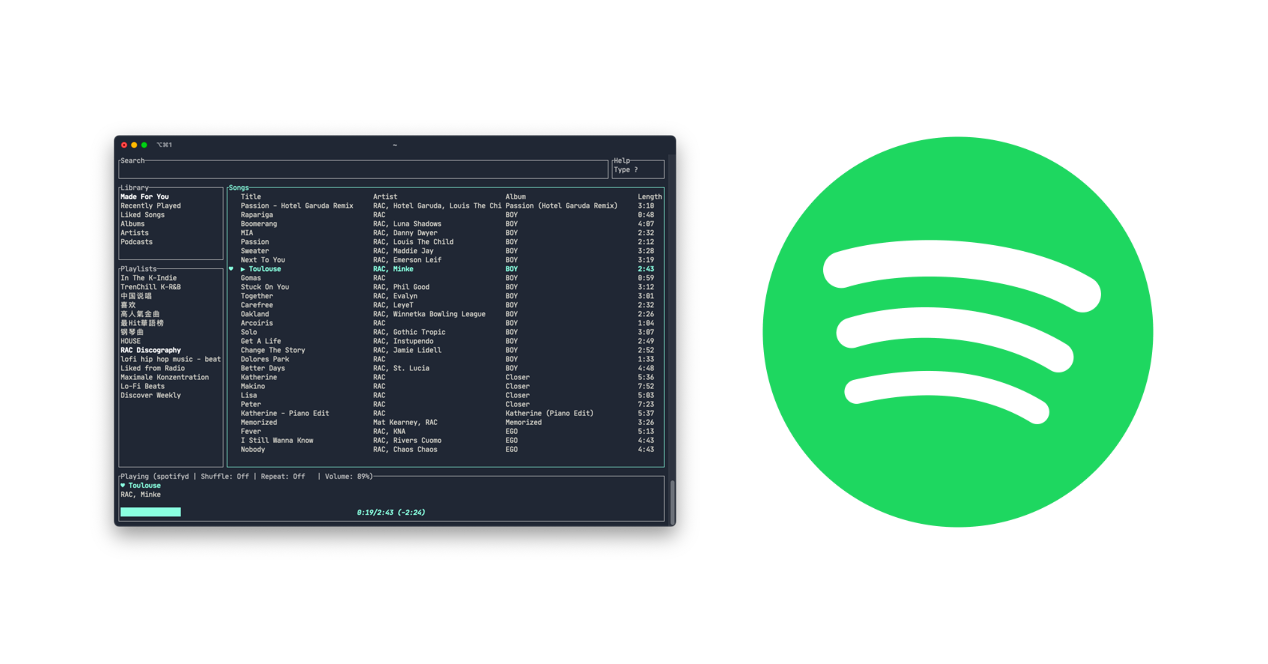
After that start up spotify-tui by running: spt. You can press d in spotify-tui to select your spotifyd daemon (it will display as your configured device_name).